Support Tickets:
Support is a very important function for any business and domain. It basically connects the clients and the organization. It helps in resolving customer issues and fixing technical bugs etc. Also it provides a complete tracking from creation to resolution of any issue.
Also Support tickets ensure that critical issues are addressed immediately, often routing them automatically to the correct department or agent.
Similarly, a support ticketing system helps in documentation,work flow management, automation, efficiency, data analysis and reporting.
By utilizing a ticketing system, companies improve both their operational efficiency and customer satisfaction by delivering faster, organized, and transparent support.
Now we will explain to you how you can create a ticket in the system for any issue which is related to your issue.
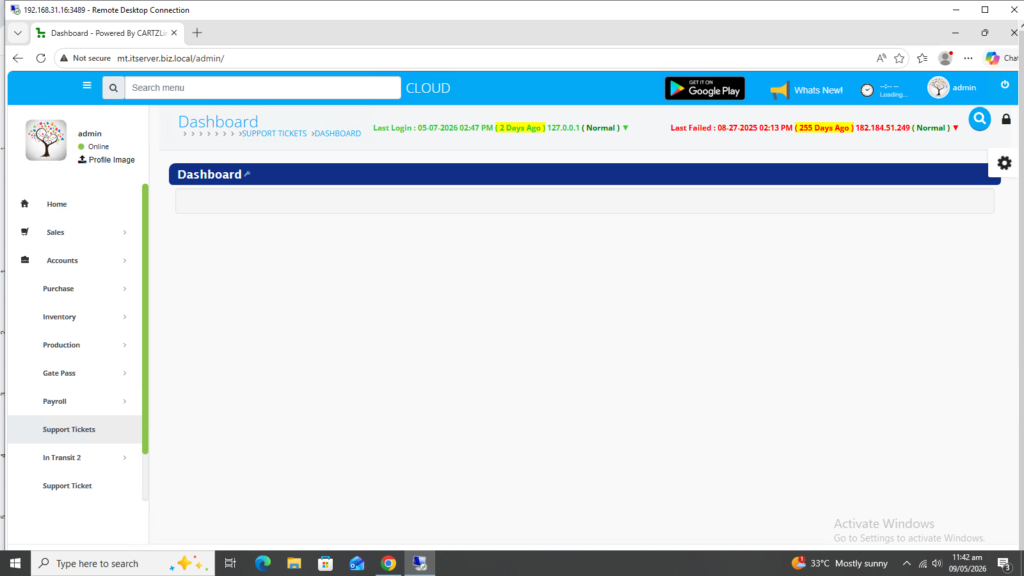
Click on Support Tickets on the menu bar.
The following page will open as shown in the screen shot below.
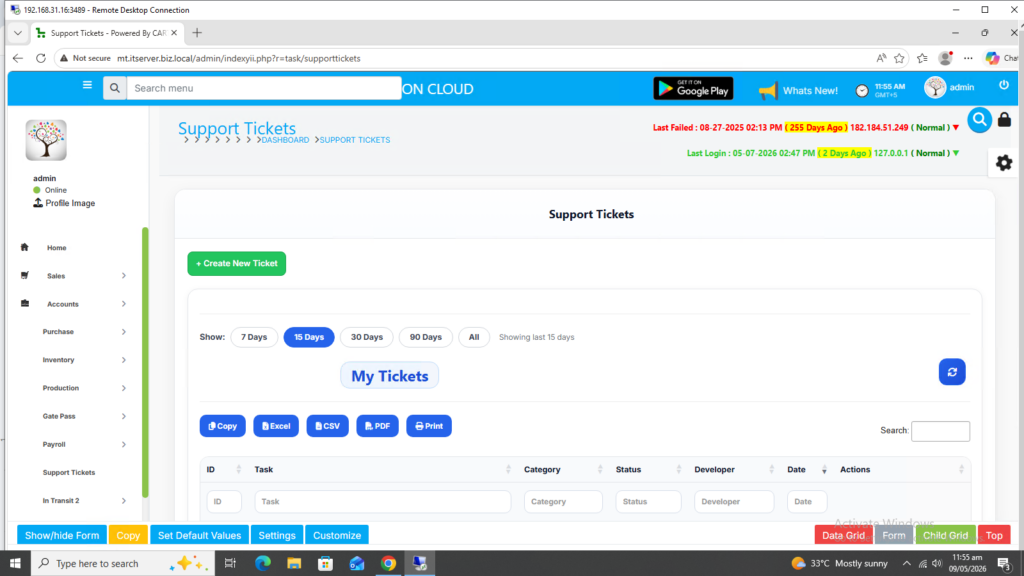
Now if you want to create and generate a New Ticket then click on Green Create New Ticket Button.

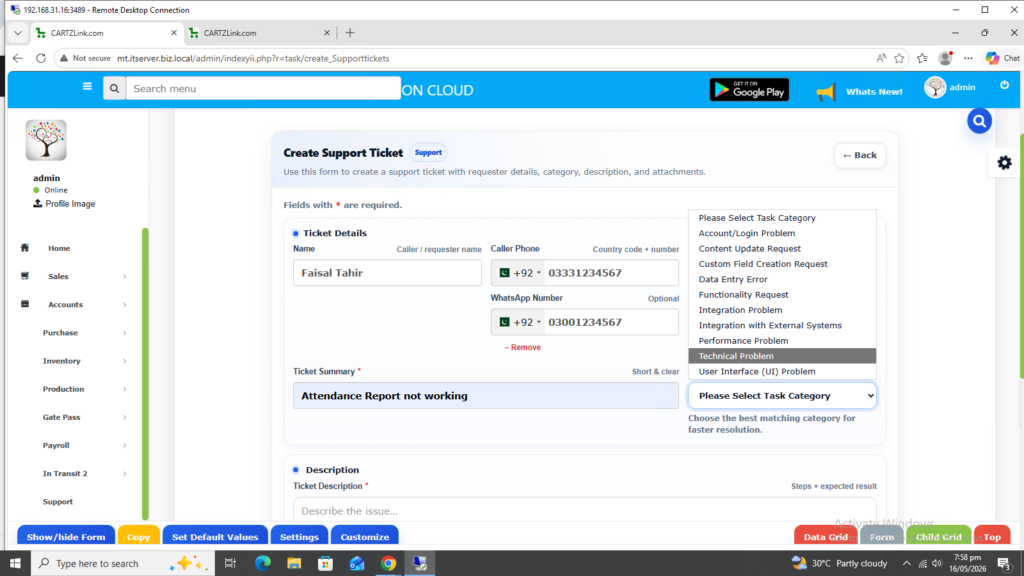
Once this button is clicked, the following page will open as shown in the screenshot below.
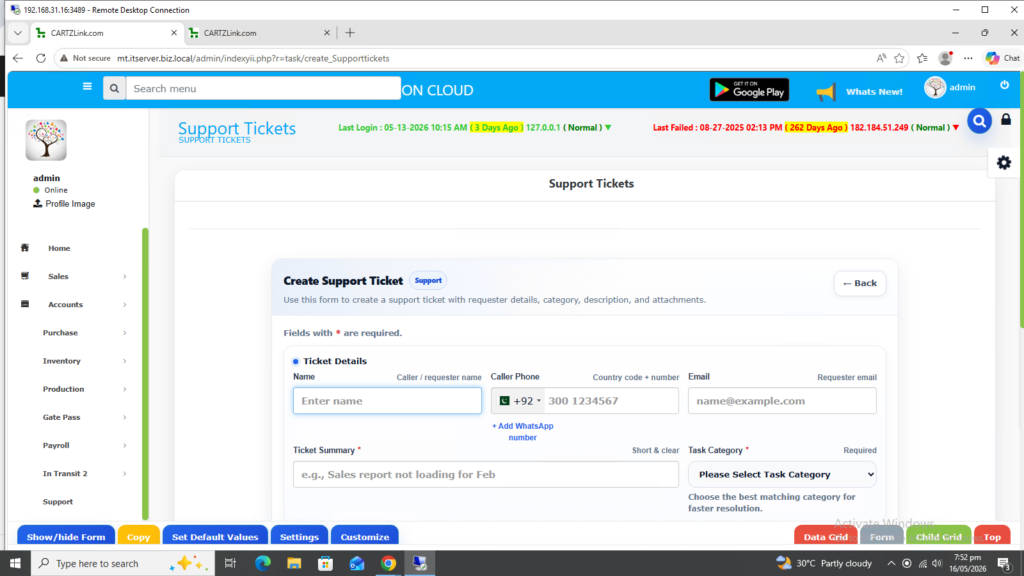
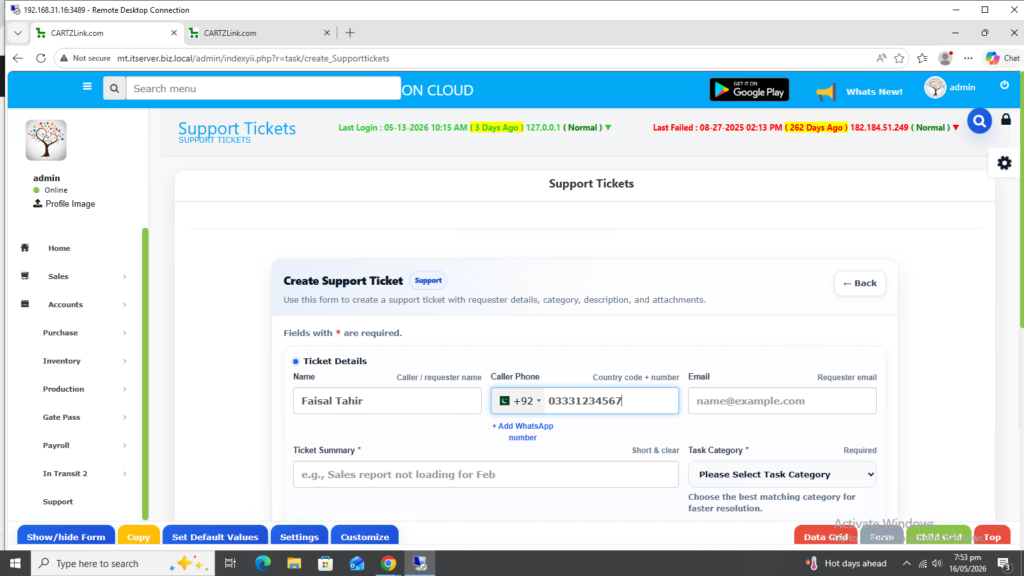
First enter your name.

Now enter your cell number.
There is an additional feature for adding WhatsApp number. Just click on Blue Add WhatsApp number option.

Here you can add your WhatsApp number. This feature is optional.
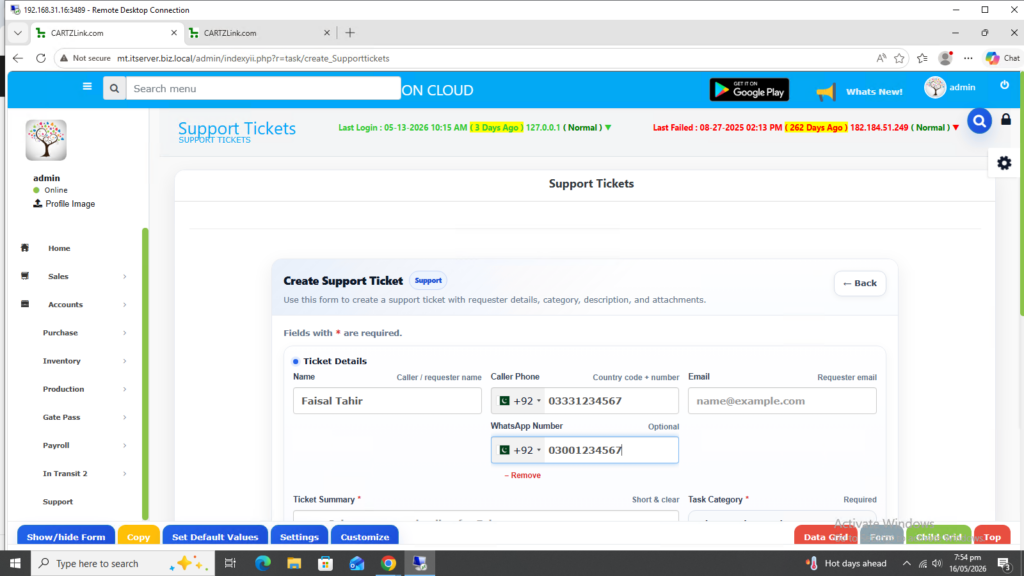
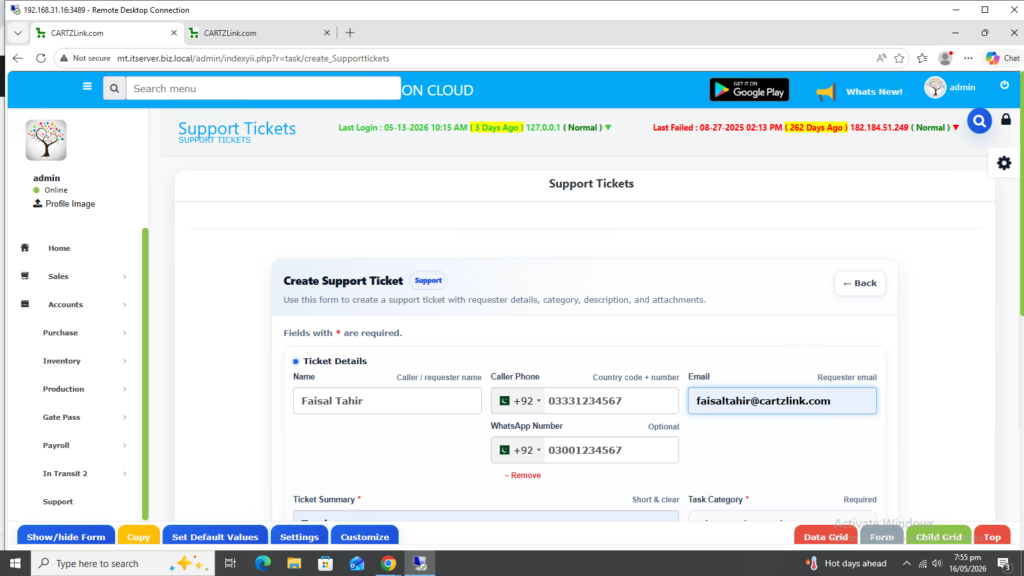
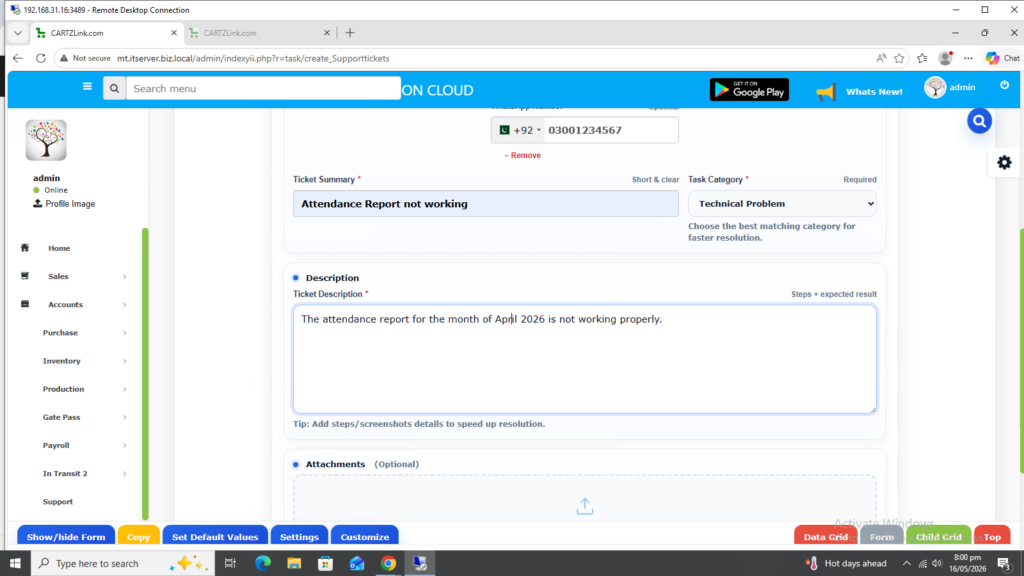
Next enter your email address.
Now in the Ticket Summary enter the short description of the task.
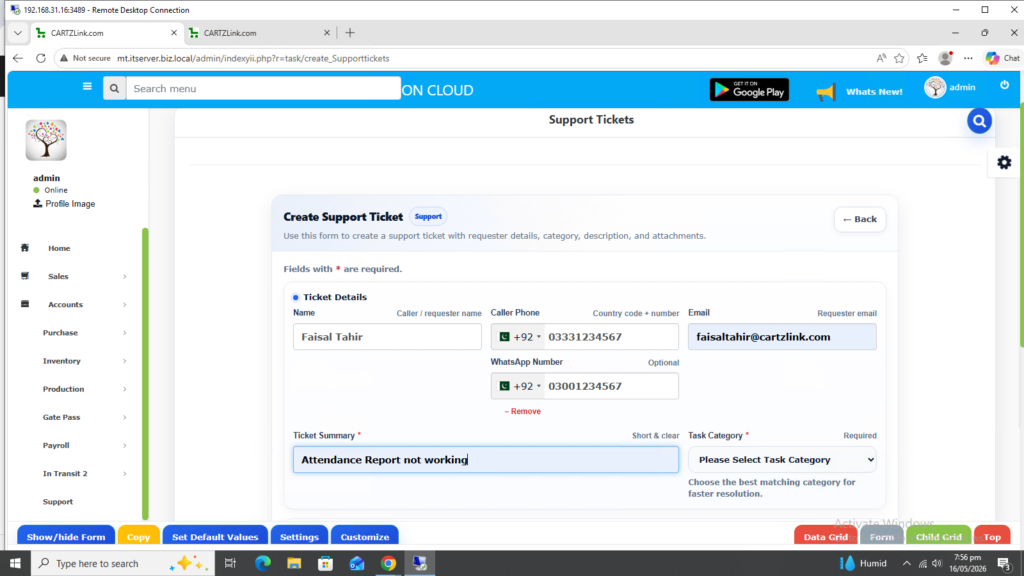
Now click on the Task Category.
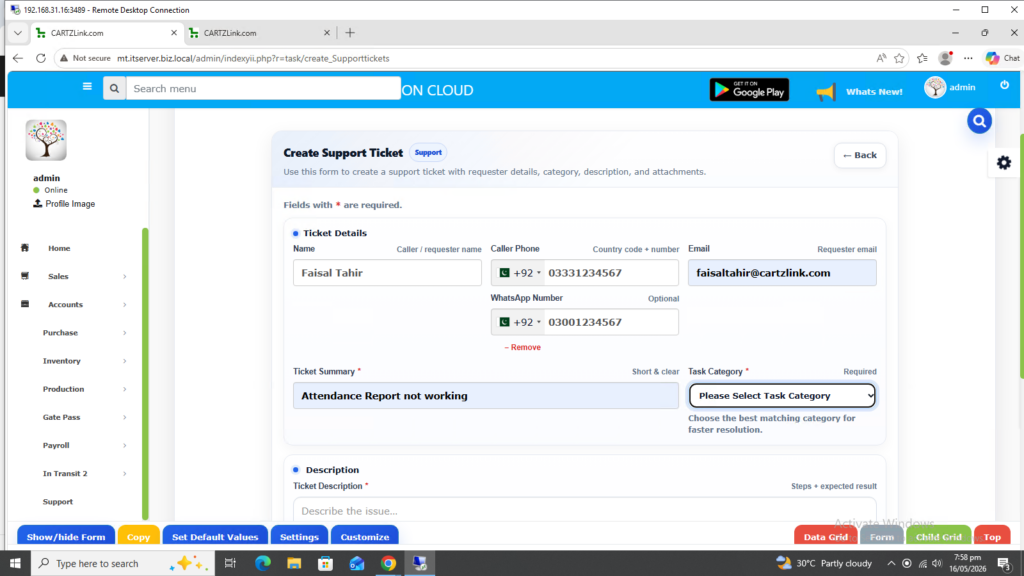
Select the relevant Task Category.
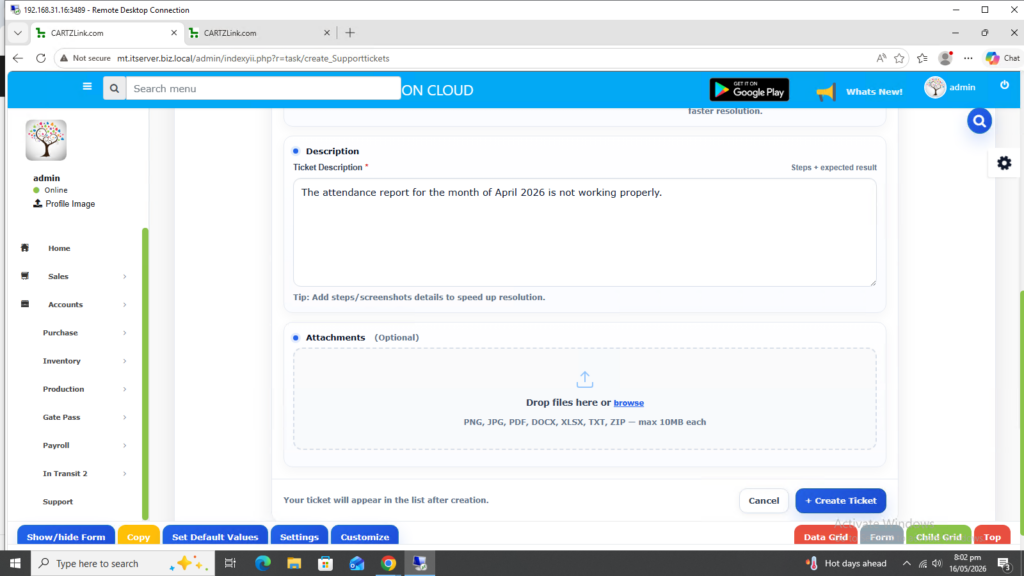
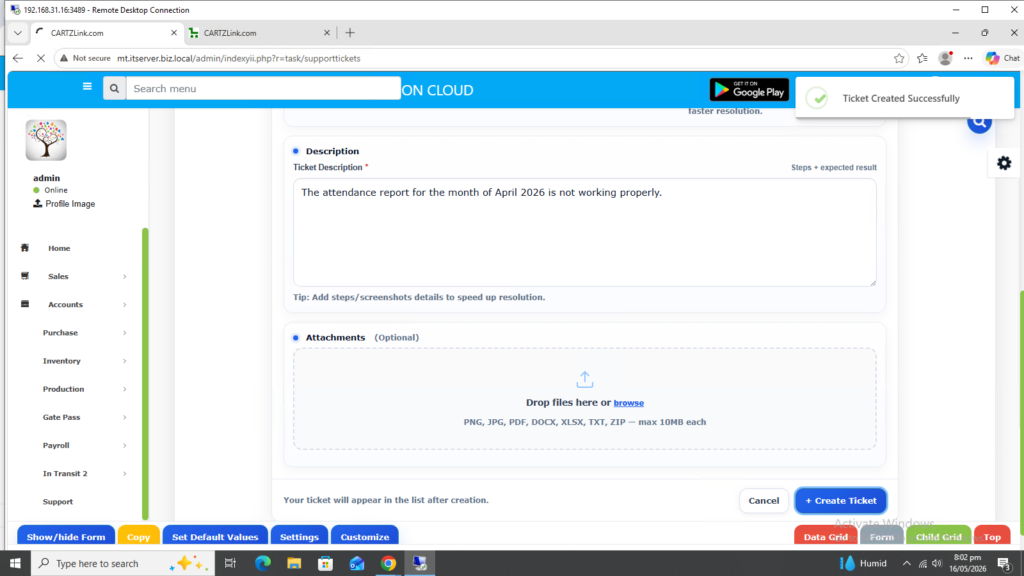
In the Description section, add the explanation related to the task for better understanding.
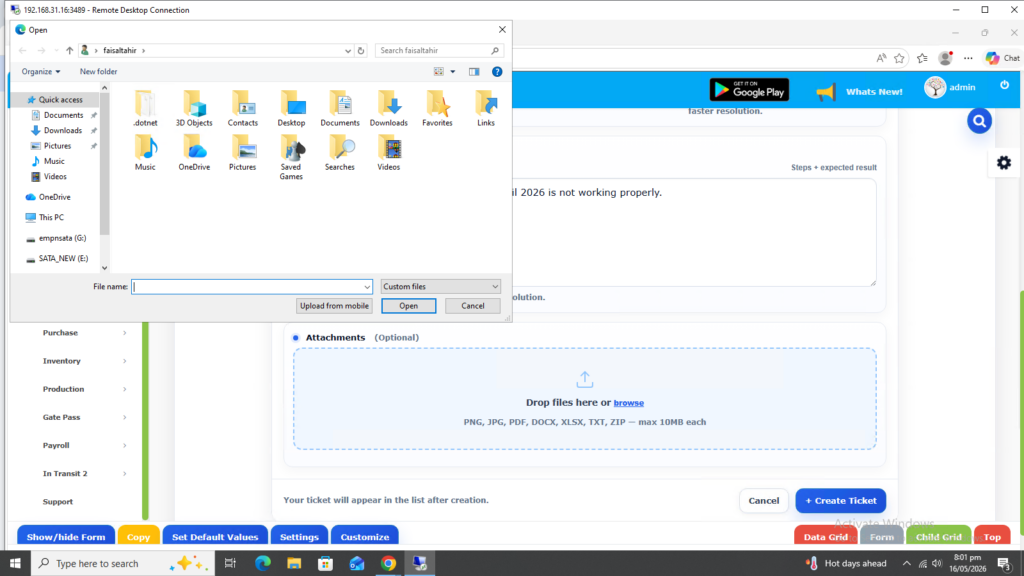
Additionally, you can add attachments also. Click on the browse option and add attachment(s) if required.
Once all mandatory information is completed, click on the Blue Create Ticket Button at the bottom.
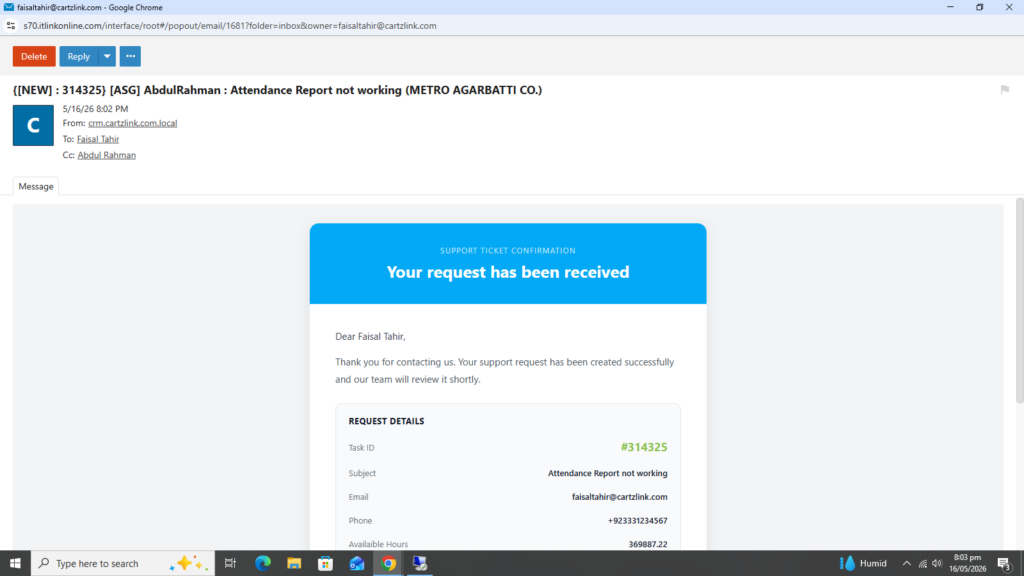
Your ticket has been created successfully.
You will receive an email regarding the ticket creation at your provided email address.
You can view the progress against this task by clicking on the View Progress button in the email.
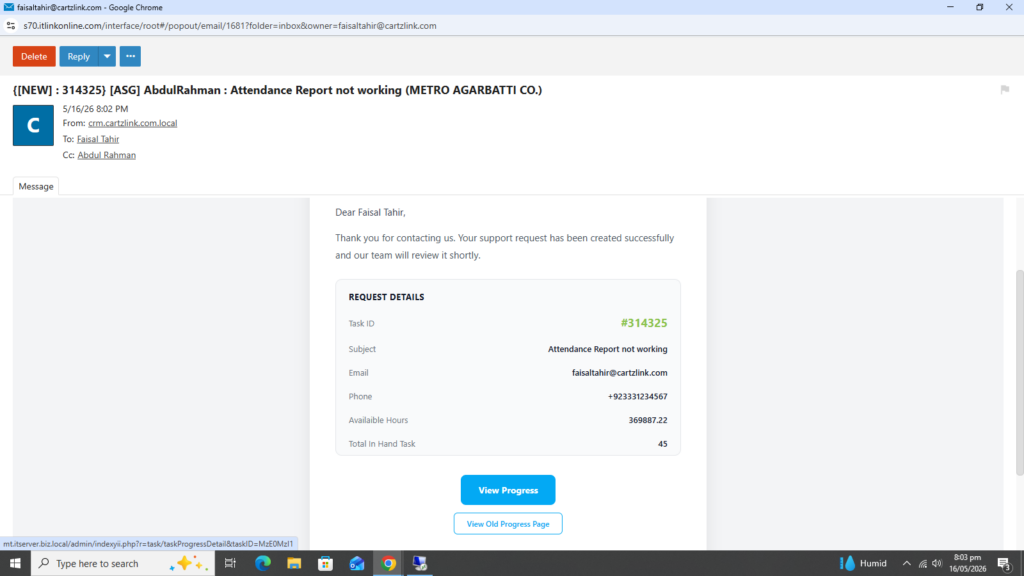
It will open the progress against this task in a new window.
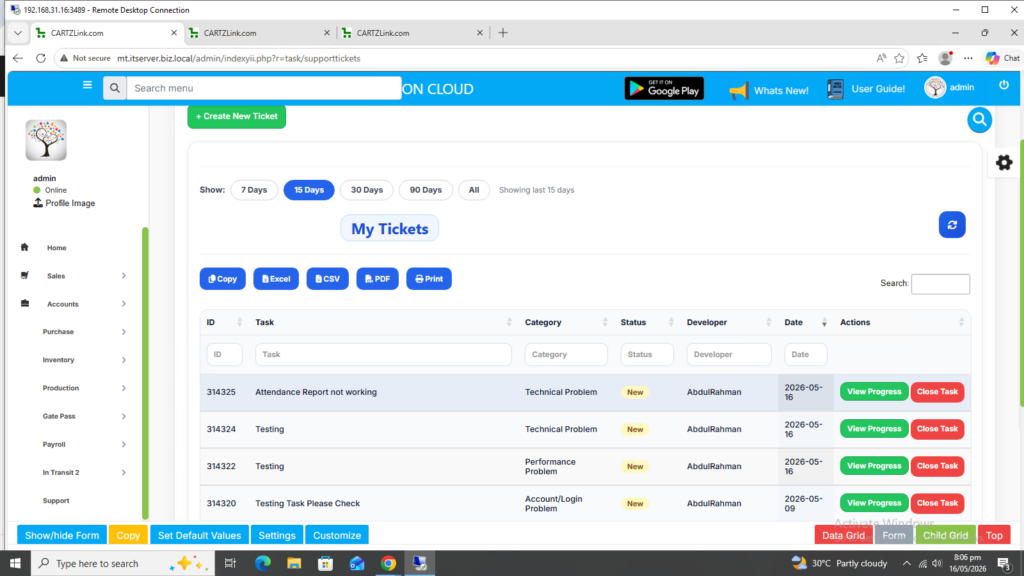
Additionally you can view the progress by clicking on the Green View Progress button which is available in the support dashboard.
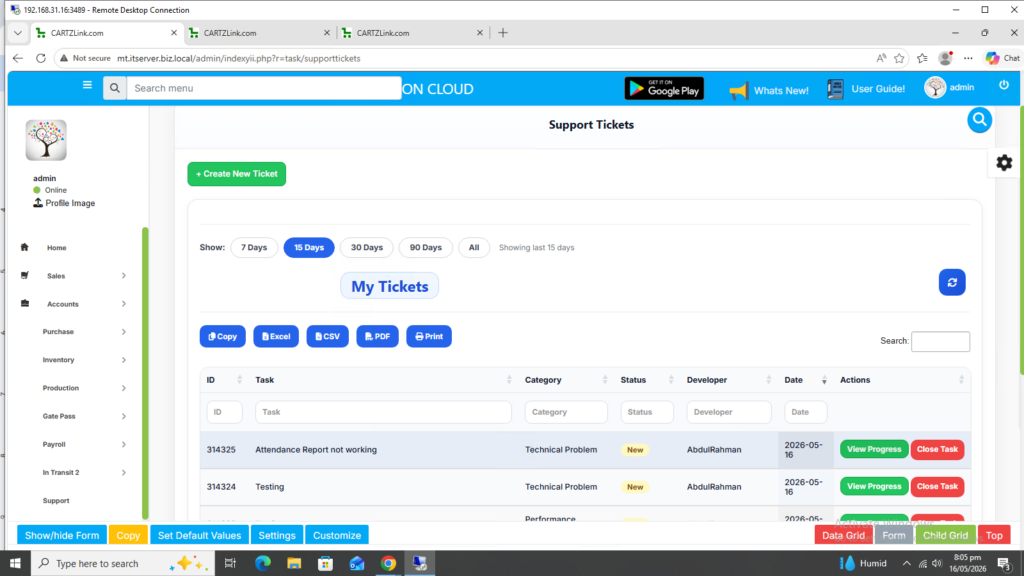
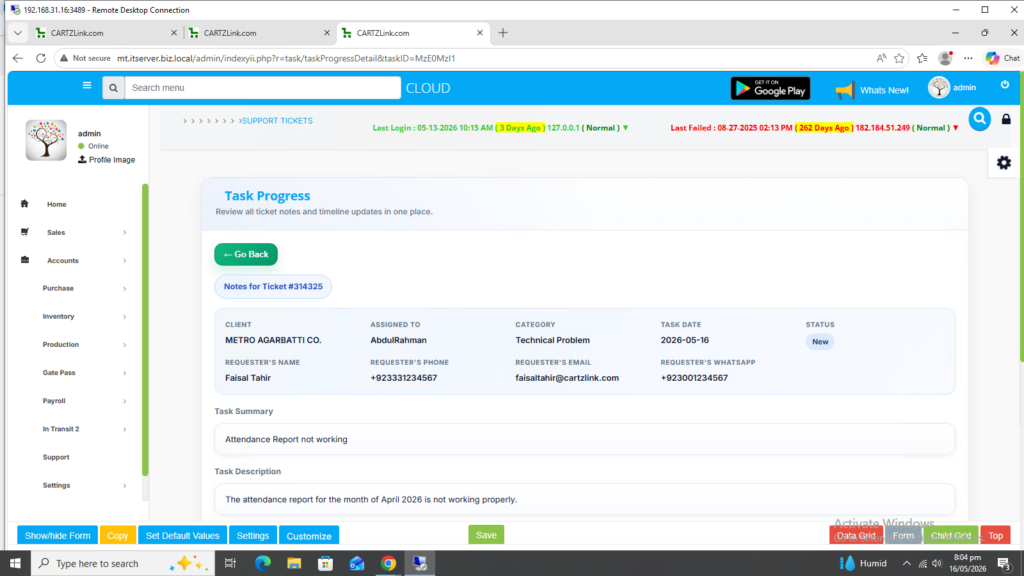
Once clicked, it will show the current progress against this task.

Here you can also view the developer’s name to whom this task has been assigned.

Similarly, there is also the option to close the task by clicking on the Red Close Task button.
Upon clicking a pop up screen will appear to confirm if the task is required to be closed.
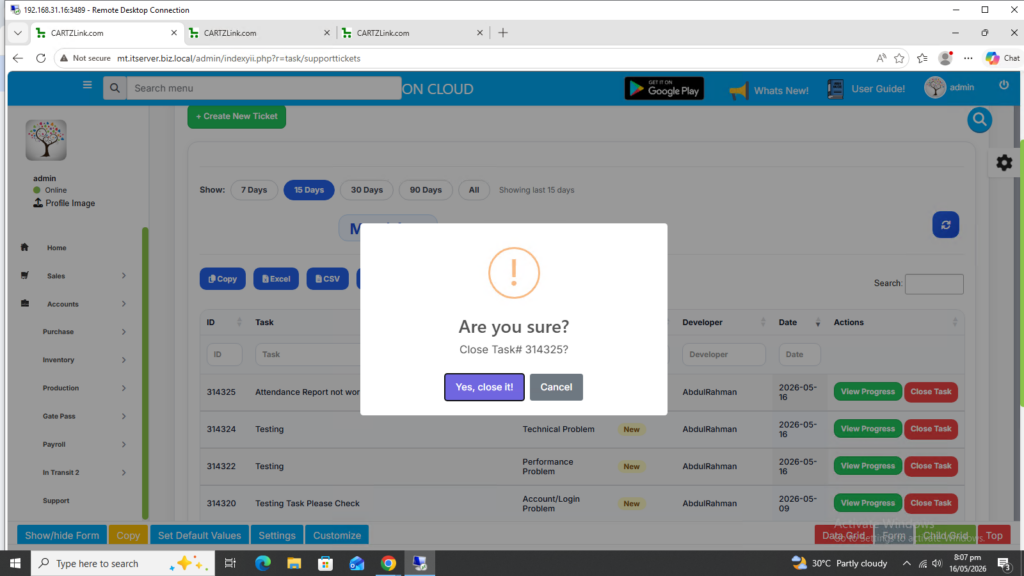
If clicked on Yes, close it! then the task will be considered as completed and closed.