Step 1: Check Existing Messaging Settings:
Run the following SQL query to view the current configuration of the messaging feature for your invoices screen:
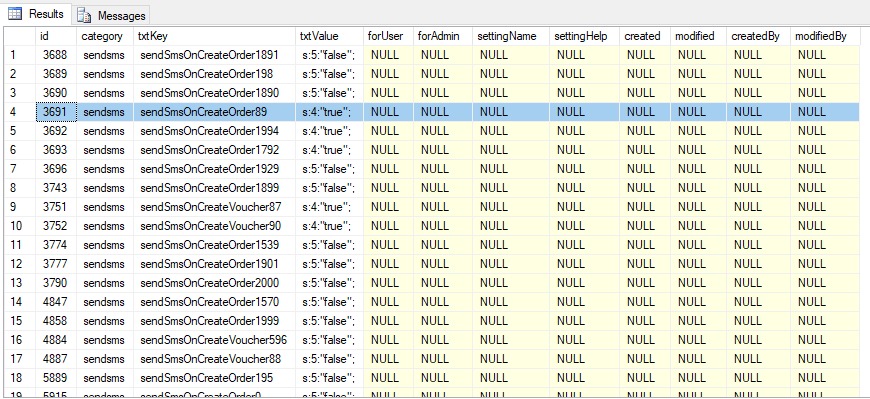
SELECT * FROM settings WHERE txtKey LIKE ‘%sendSmsOnCreateOrder%’;
This query will return a list of documents and whether the SMS/WhatsApp feature is enabled or disabled for each. Look for the txtValue column:
s:5:”false”; indicates the feature is disabled.
s:4:”true”; indicates the feature is enabled
Step 2: Enable Messaging for a Specific Document:
To enable SMS messaging for a specific document type (e.g., 89 for POS Invoice), update the txtValue in the settings table using the following SQL query:
UPDATE settings SET txtValue = ‘s:4:”true”;’ WHERE txtKey LIKE ‘%sendSmsOnCreateOrder89%’;
Replace 89 with the specific docTypeId for which you want to enable the feature.
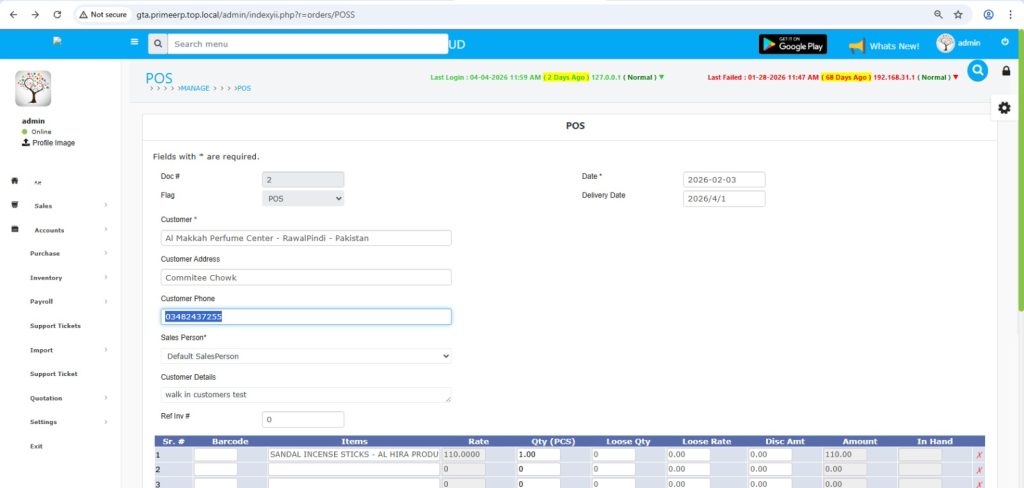
Step 3: Define Customer Numbers:
You can define which mobile number receives the message via the ERP Dashboard:
Setup Customer : When creating an order, select a customer. The system naturally fetches their default database number.
Override Number: Locate the “Customer Phone” field on the screen. If you enter a new mobile number here, the system will prioritize this new number.
Message sent upon invoice creation:
Complete your items processing and click Save.
Immediately upon saving, the system reads the chosen Customer Phone.
The invoice generates and the WhatsApp/SMS message is sent to the customers phone that you entered